How to Install A Microphone and Test the Audio Wizard
1. Purchase a microphones or headset from one of several vendors (online, in store, and over the phone). A good microphone can be
purchased for less than $10.00 (in most cases even less than $6.00)
Common Microphone found for less than $10.00

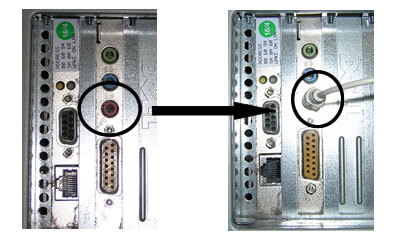
2. Once you have purchased a microphone you need to plug it into the back of your PC.
Locate the appropriate place to plug-in Microphonemost computers have a picture label of a microphoneto help you determine
the appropriate plug-in.
1. To test your audio, close all other programs, then using Internet Explorer, open eNOVA (enova.nvcc.edu). Your user name
and password are the same as the ones you use to log into Blackboard. You will see the entry screen or My Schedule Page.
3. Once you are in the session, click on Audio in the upper menu bar.
7. When you've completed testing the Speaker Volume, click Next.
8.Follow the directions in the Audio Wizard to test your Microphone Volume.

9. Click Finish to exit from the Audio Wizard and to return to the session screen.